Sign in
Remote Condenser Piping Basics for Hoshizaki Systems
February 13, 2026
95
Understanding the basics of remote condenser piping for Hoshizaki systems is crucial when installing or upgrading a remote-style commercial ice machine. These systems move heat outdoors, which lowers indoor temperatures, improves efficiency, and extends the lifespan of the equipment.
When installed correctly, remote condenser setups provide significant long-term benefits, lower operating costs, and a better return on investment. However, incorrect installation can lead to poor ice production, frequent service calls, and early component failure. This guide explains what installers should watch for, how to install piping correctly, and where common mistakes happen.
Key Piping Requirements
Line length and elevation limits
Hoshizaki sets maximum refrigerant line lengths and allowable height differences between the ice machine and the remote condenser. Exceeding these limits reduces efficiency, stresses the compressor, and raises operating costs.
Installers check these limits before deciding on the condenser's location.
Correct refrigerant line sizing
Remote systems rely on properly sized liquid and suction lines. Lines that are too small or too large hinder refrigerant flow, impacting cooling capacity and long-term reliability.
Incorrect sizing directly affects energy use and system return on investment.
Secure mounting and vibration isolation
Remote condensers need to be mounted on stable brackets with vibration isolation. Without proper support, refrigerant lines can flex and wear out, leading to leaks and a shorter system lifespan.
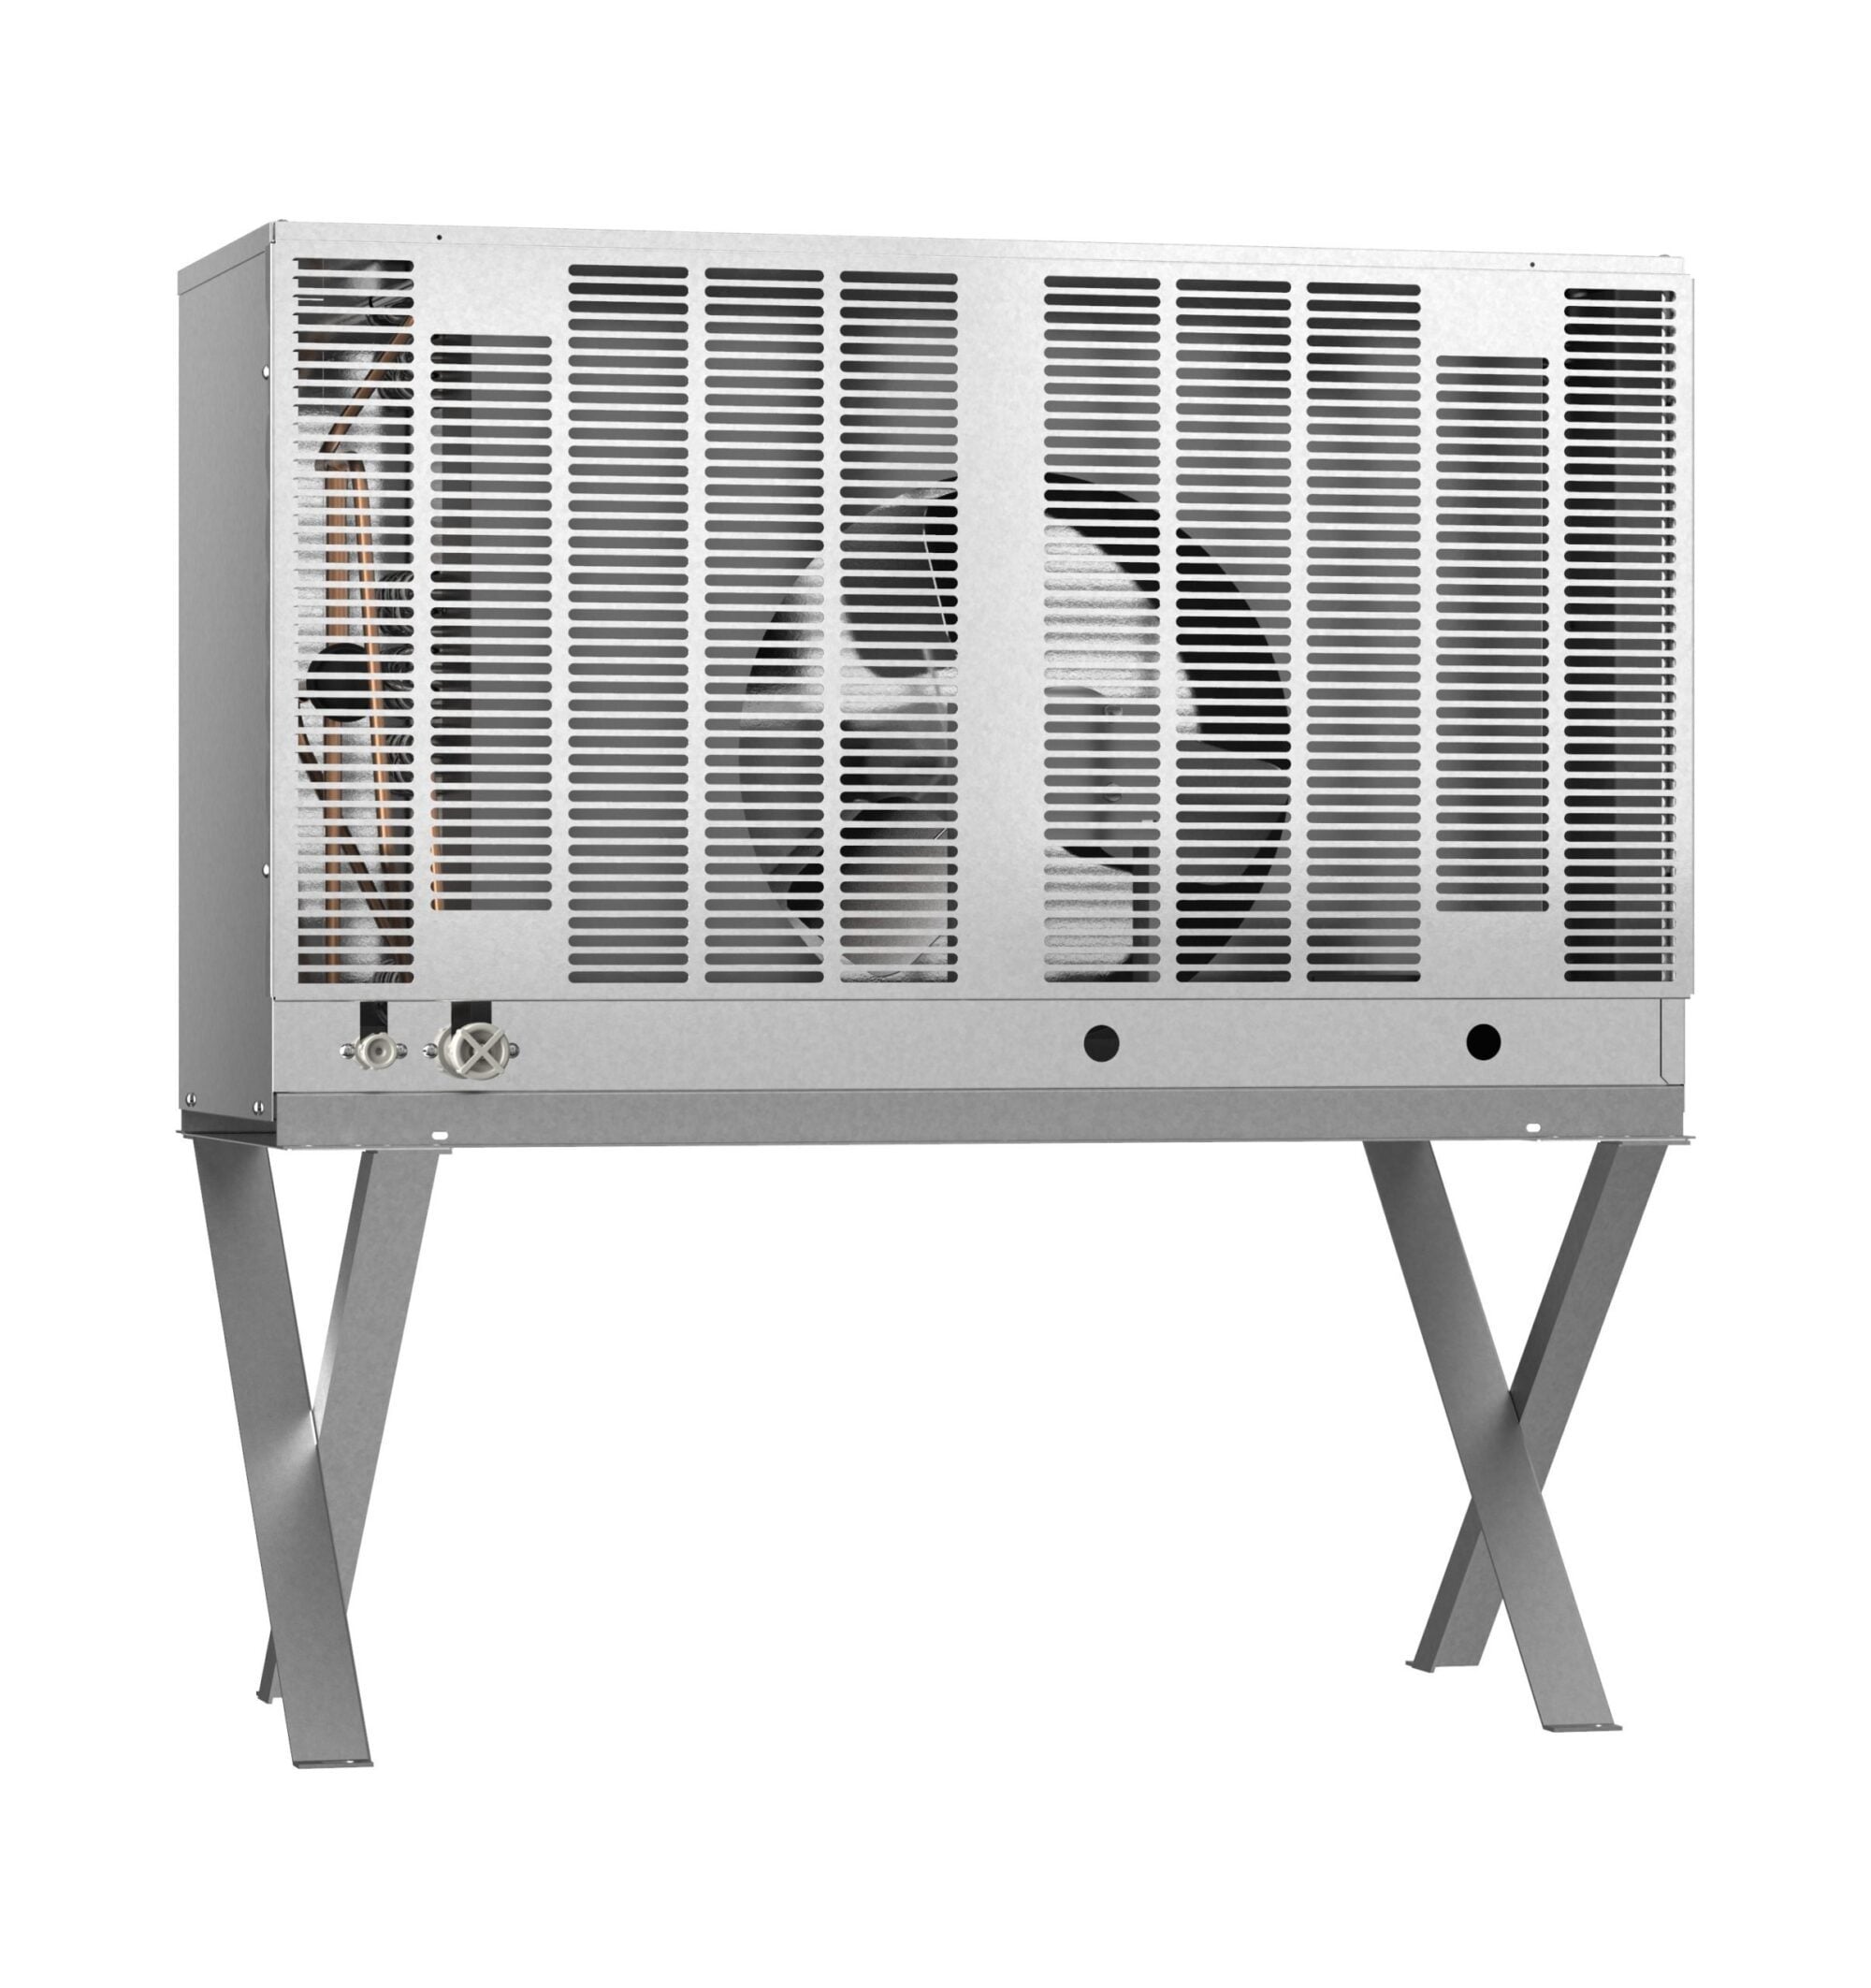
Proper airflow and condenser placement
The condenser should be installed where there is clear airflow and enough space on all sides. While shaded areas are ideal, airflow must not be blocked.
Condenser placement should be planned as part of a complete installation strategy outlined on our installation page.
Weather exposure and protection
Outdoor condensers need weather-rated components, secure electrical connections, and conduit that meets code. In harsh conditions, extra protection may be necessary for long-term reliability.
Installation Process Overview
Step 1: Pre-installation planning
Installers examine the ice machine model, condenser specifications, line sizing charts, and height limits. They assess building layout constraints before any piping installation.
Step 2: Run refrigerant piping
Copper piping is measured, routed with minimal bends, and properly supported. All joints are brazed using nitrogen to avoid scale buildup inside the lines; this is vital for system longevity.
Step 3: Insulate and secure line sets
Suction lines are fully insulated to avoid condensation and heat gain. Line sets are tightly strapped to structural supports to prevent movement and vibration damage.
Step 4: Mount and wire the remote condenser
Technicians mount the condenser, connect wiring, and install outdoor-rated conduit according to local code. They check airflow paths to ensure stable head pressure during operation.
Step 5: Pressure test and evacuate
The refrigerant circuit undergoes a pressure test for leaks, and then it is evacuated to remove moisture and air. Proper evacuation is necessary for efficient cooling and long-term reliability.
Step 6: Charge and test the system
After charging, installers monitor pressures, temperatures, freeze cycles, harvest timing, and condenser fan operation. Ongoing maintenance support is available through our service page.
Common Installation Mistakes
Incorrect line sizing
Using the wrong diameter for refrigerant pipes is a common issue. This lowers efficiency, raises energy usage, and reduces the return on investment for a remote condenser system.
Excessive line length
Lines that exceed Hoshizaki’s limits lead to pressure loss, poor ice production, and compressor strain, even if the system seems to work initially.
Restricted condenser airflow
Condensers blocked by walls, fences, or plants cannot release heat efficiently. This causes overheating and speeds up wear.
Poor brazing practices
Not brazing with nitrogen can allow internal scale to form, clogging metering devices and leading to repeated service problems.
Improper elevation differences
Changes in height outside manufacturer limits disrupt oil return and increase compressor wear, shortening system value.
Final System Verification
Confirm refrigerant pressures and temperatures
Installers document operating pressures, suction temperatures, and superheat/subcool readings to ensure proper system performance.
Check condenser airflow and fan cycling
The condenser should have steady airflow and correct fan operation under load.
Inspect insulation integrity
Gaps or damaged insulation can result in sweating, water damage, and reduced efficiency. Line sets must be completely sealed.
Run ice production under load
Multiple freeze and harvest cycles are performed before signing off to confirm consistent output and stable operation.
Plan your install with our team — see the installation page or contact us at our contact page.
Remote Condenser Piping Basics for Hoshizaki Systems
Intro
Understanding remote condenser piping basics for Hoshizaki systems is essential for any operator installing or upgrading a remote-style commercial ice machine. These systems relocate the condenser outdoors, improving efficiency, reducing indoor heat, and enhancing long-term performance. When done correctly, the setup improves lifetime value, lowers energy use, and supports a stronger return on investment for your business. When done incorrectly, it leads to costly service calls, poor ice production, and premature equipment failure. This guide walks you through key requirements, common mistakes, and what installers verify before final startup.
Requirements
Line length and elevation limits
Hoshizaki specifies maximum refrigerant line lengths and allowable elevation differences between the ice machine head and the remote condenser. Exceeding these limits can dramatically reduce efficiency and raise operating costs. Installers check these specs before choosing the condenser location.
Proper refrigerant line sizing
Remote systems rely on correctly sized liquid and suction lines. Undersized or oversized piping affects cooling capacity and long-term equipment performance. This directly impacts operating cost analysis and overall system ROI.
Secure mounting and vibration isolation
Remote condensers require stable mounting brackets and vibration dampers. Without them, refrigerant lines can fatigue over time, compromising the system’s lifetime value.
Correct airflow and placement
The condenser must sit in an area with adequate airflow and minimal obstructions. Shaded locations are preferred, but the unit must still maintain proper clearance on all sides. Installers often coordinate this step as part of a full install plan on our installation page.
Weather protection
Remote condensers need proper weather exposure rating, secure wiring, and local-code-compliant conduit. Outdoor units exposed to harsh environments may require additional protection for long-term reliability.
Steps
1. Pre-installation planning
Installers begin by reviewing the ice machine model, condenser specifications, and required line lengths. If the building layout limits where the condenser can be placed, they verify feasibility before running piping.
2. Install refrigerant piping
Copper piping is measured, cut, and routed with minimal bends and proper support. All joints are brazed using nitrogen purge to prevent scale and debris inside the lines — a critical factor in long-term efficiency.
3. Add insulation and secure line sets
Suction lines must be fully insulated to prevent condensation and maintain proper cooling. Line sets are strapped securely to walls, ceilings, or support brackets to avoid movement or vibration damage.
4. Install and wire the remote condenser
Technicians mount the condenser, connect electrical wiring, and follow code requirements for outdoor-rated conduit. Clear airflow is confirmed to ensure the system maintains stable head pressure during operation.
5. Pressure test and evacuate the system
A critical step, installers pressure-test the refrigerant lines for leaks before pulling a vacuum to remove moisture and air. Proper evacuation ensures efficient cooling and avoids long-term service issues.
6. Charge the system and test operation
Once charged, the system is started and monitored for correct pressures, temperatures, and refrigerant flow. Installers verify harvest consistency, freeze times, and condenser fan operation. For ongoing support, operators can reference our service page.
Common Pitfalls
Improper line sizing
One of the most common installation issues is incorrect refrigerant pipe diameter. This leads to reduced cooling efficiency and higher operating costs, reversing the intended ROI of a remote-style setup.
Excessive line length
Running lines longer than Hoshizaki’s limit causes pressure drop, poor ice production, and compressor strain. Even if the system still runs, it may consume significantly more energy.
Insufficient airflow around the condenser
Outdoor units blocked by fences, walls, or vegetation cannot reject heat properly. This causes overheating, reduced efficiency, and long-term performance decline.
Poor brazing technique
If nitrogen is not used during brazing, scale forms inside the piping. This debris can damage metering devices and lead to repeated service calls.
Improper elevation differences
Height differences outside of Hoshizaki specifications can cause oil return issues and compressor wear. Over time, this reduces the system’s lifetime value and service stability.
Final Checks
Verify refrigerant pressures and temperatures
Installers log operating pressures, suction temperatures, and superheat/subcool values. Out-of-range readings indicate potential piping or airflow issues.
Check airflow and condenser fan operation
A remote condenser must demonstrate steady airflow with no obstructions. Technicians ensure the fan cycles correctly under load.
Confirm pipe insulation quality
Any gaps or tears in insulation can lead to sweating, water damage, and efficiency loss. Line sets should be fully sealed end-to-end.
Test ice production under load
Before sign-off, installers run multiple harvest cycles to confirm stable output. This protects your investment and helps ensure strong long-term performance.
Plan your install with our team — see our Installation page or contact us for support.
Featured Product


Recent Posts


Login and Registration Form