Sign in
Hoshizaki Installation Checklist: Power, Drainage, Clearances, Venting
December 07, 2025
135
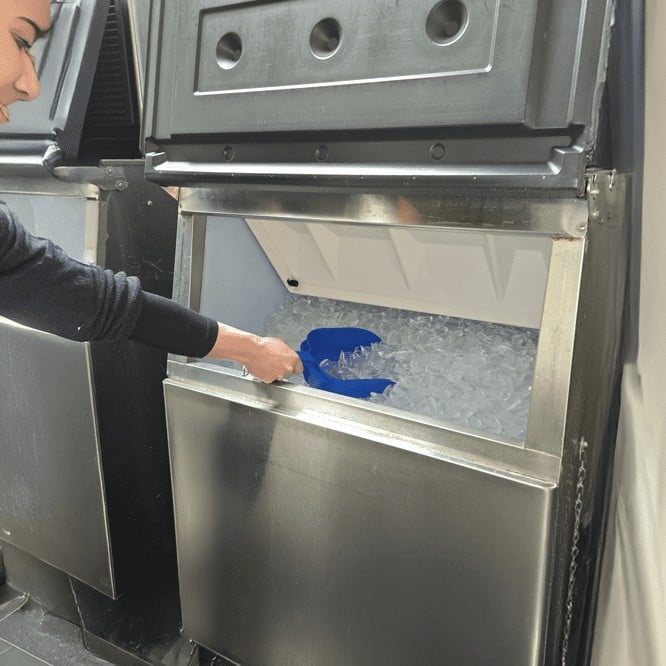
A good start matters for every Hoshizaki unit - hitting each step on the install list for electricity, water flow, spacing, or airflow means it runs strong right away.
Many setup troubles happen because of small mistakes - like wrong power source, blocked air movement, or bad water runoff. When these pop up, output drops, machines get louder, and also trigger repairs sooner. Here’s a no-jargon walkthrough using plain terms anyone can follow, helping your business ice maker work right without hiccups.
Who It’s For
This piece works for eateries, coffee spots, pubs, lodgings - any spot setting up or swapping out a heavy-duty ice maker.
When picking an undercounter model, a modular setup, or one with a remote condenser, this list keeps you from typical errors. Really handy when looking at units such as Hoshizaki KM Edge, square-shaped cube makers, or machines that make small cubelets.
Key Installation Considerations
Power requirements
Most business-grade ice makers need a certain power setup. Some Hoshizaki machines run on 115 volts, but bigger ones usually use between 208 and 230 volts instead.
A wrong power setup might lower ice production or harm parts. Use a separate electrical line, and also check the breaker rating prior to setting it up. Look at the setup manual for guidance instead.
Drainage setup
Ice makers keep turning ice into water, so getting rid of that liquid matters a lot. Based on which type you have, use a gravity-based outlet or a pumping system instead.
Poor drainage might lead to clogs, smells, or water spilling inside. Use a sloping path for the pipe so waste flows out easily; skip tight turns, particularly when installing below counters where room is tight.
Space needs for air-cooled units
Air-cooled ice makers need steady air movement to work properly. Not leaving enough space near the exhausts? That’s a frequent setup error people make.
Most units require an open room at the back and sides so air moves well. Poor circulation causes them to run hot, work less, while sounding noisier.
Ventilation in hot places
Machines close to ovens, fryers, or dishwashers face high heat. Because of that, they might make 20–30% less ice.
Fresh air flow matters just like wiring does. Where it gets really hot, using a distant condenser can shift warmth outdoors instead.
Water purity plus how it’s cleaned
Filtered water makes clearer ice, shields inner parts from damage, or cuts down on mineral deposits. Though filtering isn’t required, most users benefit when they use it in commercial ice makers.
Model and Ice-Type Fit
Crescent cube machines
Crescent cubes work well in busy restaurants - they flow smoothly plus last longer before melting. If you want something tough yet reliable, check out the KM Edge line.
Cubelet, along with flake ice gear
Soft cube ice shows up in cafes, drink spots, and medical centers. These units need smart drain setups since they make ice nonstop.
Check what’s on offer in the cubelet section. When it comes to cooking or showing off dishes, go for flakers - they work great.
Square cube machines
Square cube machines pop up a lot when making high-end drinks. Thanks to steady water heat plus solid air movement, they work well. Check out different versions in the square ice lineup.
Sizing Math
Guess how much ice you'll need each day
Follow these basic tips:
- Restaurants: about 1.5 to 2 pounds for each person
- Bars: as much as 3 pounds for each spot
- Cafés use between 0.8 and 1.5 pounds per beverage
If you want exact numbers, use the ice machine size calculator.
Keep some extra ready when things get busy
Most companies don't guess right how much they’ll need. To avoid running out when things get busy, toss in an extra 20–30%.
Pair output with holding space using either - so - while - together
Ice output needs to match bin capacity. When a fast machine links up with a tiny bin, it can falter under heavy rush demands.
Final Installation Notes
Check how much room you’ve got before buying
Check the width, then measure depth - make sure height fits along with space for doors to open. For undercounter setups, get numbers right; this is extra key if it’s a front-vent type.
Confirm drain access
If the unit's not near a floor outlet, you might need a small pump instead. That way, water flows out properly, so it doesn't come back or cause messes.
Double-check electrical specs
Check the voltage, breaker size, or outlet type before setting it up. Getting ready early stops hold-ups yet keeps things running.
Plan airflow paths
Machines tucked into enclosures or shoved near walls with no space around them might cook themselves. Plan where to put them by thinking about the air moving through.
Maintenance
Routine cleaning messes up less when done often, yet skipping it causes bigger issues down the line. Buildup throws off freeze timing, whereas weak airflow pushes parts too hard.
Regular upkeep keeps machines running longer while holding their full power. To get help with servicing, check out the support section online.
Get a fast quote and delivery date—start with our ice machines or message us via our contact page.
Hoshizaki Installation Checklist: Power, Drainage, Clearances, Venting
Intro
A proper setup is essential for any Hoshizaki machine, and understanding the Hoshizaki installation checklist: power, drainage, clearances, venting ensures your equipment performs at its rated output from day one. Most installation issues come from simple oversights—incorrect electrical supply, limited airflow, or poor drainage. These can reduce production, cause loud operation, or lead to early service calls. This guide breaks down the installation basics in clear, beginner-friendly steps so your commercial ice equipment runs reliably and efficiently.
Who It’s For
This article is for restaurants, cafés, bars, hotels, and any business adding or replacing a commercial ice machine. If you’re choosing between an undercounter unit, a modular setup, or even a remote condenser system, this checklist will help you avoid common mistakes. It’s also useful if you're browsing models in categories like Hoshizaki KM Edge, square cube machines, or cubelet ice equipment.
Key Considerations
Power requirements
Every commercial ice machine has a specific voltage and amperage requirement. Many Hoshizaki units run on 115V, but larger machines may need 208–230V. Incorrect power can reduce ice output or damage components. Always verify breaker size and use a dedicated circuit. If you're unsure, consult the professional installation guide.
Drainage setup
Ice machines constantly melt stored ice, so you need proper drainage—either a gravity drain or a drain pump setup. A poor drain line can cause backups, odors, or internal flooding. Plan for a downward slope and ensure no kinks or tight bends in the drain hose. This is especially important for undercounter machines where space is tight.
Clearances for air-cooled units
Air-cooled machines need airflow to function efficiently. Not leaving enough space around vents is one of the top installation mistakes. Standard air-cooled clearance recommendations include a few inches on the sides and rear, though some models require more. Poor airflow leads to overheating, reduced output, and noisy operation.
Ventilation for warm locations
If your machine sits near ovens, fryers, or dishwashers, heat buildup can reduce production by 20–30%. Ventilation is just as important as power. In hotter environments, a remote condenser setup may be the best solution to move heat outdoors.
Water quality impact
Clean, filtered water improves ice quality, reduces service issues, and helps prevent scale buildup. It also protects evaporator plates and ensures consistent freezing cycles. While filtration isn’t mandatory, it's strongly recommended for every commercial ice machine.
Model/Ice-Type Fit
Crescent cube machines
Crescent cubes are ideal for high-volume restaurants because they don’t splash when poured and melt slowly. For durable, energy-efficient models, explore the KM Edge series. These machines are easier to install in a wide range of layouts thanks to their efficient evaporator design.
Cubelet and flake ice equipment
Soft, chewable cubelet ice is popular in cafés, tea shops, and healthcare settings. These machines often require more careful drainage planning due to their continuous production system. You can find options in the Hoshizaki cubelet category. For food prep and displays, flaker models are well-suited.
Square cube machines
If you serve premium cocktails, consider IM square cube models for slow melt and clear presentation. These units benefit from stable water temperature and good airflow around the machine, making installation prep especially important —view options in the square cube collection.
Sizing Math
Step 1: Estimate daily ice use
Basic usage guidelines:
- Restaurants: 1.5–2 lbs per guest
- Bars: up to 3 lbs per seat
- Cafés: 0.8–1.5 lbs per drink
For precision sizing, try the ice machine size calculator.
Step 2: Add a buffer for peak hours
It’s common for businesses to underestimate their needs. Adding 20–30% additional capacity ensures your machine stays ahead during rush periods.
Step 3: Match production to storage
Storage bins vary widely. A 450 lb/day machine paired with a 200 lb bin may still fall behind during consecutive rush periods. Ensure production and storage work together to support your workflow.
Install Notes
Measure your space before buying
Measure width, depth, height, and door clearance for delivery. Undercounter units require exact measurements, especially if they are front-venting. Tight spaces make installation trickier, so knowing dimensions ahead of time avoids delays.
Confirm drainage access
If the machine will sit far from a floor drain, you may need a pump. Proper drainage prevents backflow and helps maintain sanitation. Always consider the distance to the drain when placing modular machines.
Double-check electrical requirements
Before installation day, confirm voltage, breaker size, and outlet type. If changes are required, your team can plan and avoid downtime. More details are available in our installation guide.
Plan ventilation paths
Airflow matters as much as power. Machines placed inside cabinets or against walls without clearance can overheat and produce less ice. Create an airflow plan that prevents heat trapping.
Maintenance
To keep your commercial ice machine running smoothly, maintain a regular cleaning and sanitizing schedule. Scale buildup disrupts freezing cycles, while poor ventilation causes overheated components. Professional maintenance helps extend machine life and improve reliability. If you need scheduled service, check our service page.
Get a fast quote and delivery date — start at our Ice Machines page or message us through our Contact page.
Featured Product


Recent Posts


Login and Registration Form